And it packs better.
I’ve been “reading” through Dave Chenault’s blog recently. Actually, I discovered how to get google to read me articles and have been audiobooking my way through his back catalog over the past month or so. I’m still only to about 2011 and have many many posts to go, but most of the things that are of direct interest to me occurred over the past decade anyway. Namely, his descriptions of and tutorials on making your own backpacks.
Dave is insightful and exceptionally creative, originating his own designs and adopting smart things he’s seen already on the market. He has also worked in a consultative capacity with a few backpack brands over the years and has recently developed his own single–stay, lightweight pack, called the Tamarisk, which looks quite cool. I think he’s been hoping to put it into production, but I haven’t seen an order page yet. Smart people will be keeping an eye on that in the future.
My own first experience with designing a pack from the ground up didn’t go quite so well. The pack worked and looked okay, but it didn’t function as I hoped it would, and I wasn’t sure how to go about improving the design. Enter Dave’s blog.
Listed below are the ideas I’ve blatantly stolen from him or tweaked slightly to fit my own needs:
- Shaped side panels that move toward the back as the panel reaches the shoulder blades. This allows the pack to hug the wearer’s back and not fall away from them as my original pack did. This feature isn’t needed with packs that have a frame.
- Shock cord to close the side pockets with. Easy to replace if it breaks or loses stretch. I also stole his small grosgrain loop at the top end of the pocket. This solves the replaceability problem beautifully.
- The adjustable buckle at the roll top closure to aid in cinching down loads.
- Daisy chains running vertically along the outside of the front panel for attaching things to the pack externally or routing compression webbing. His Tamarisk design eschews these for horizontal ones.
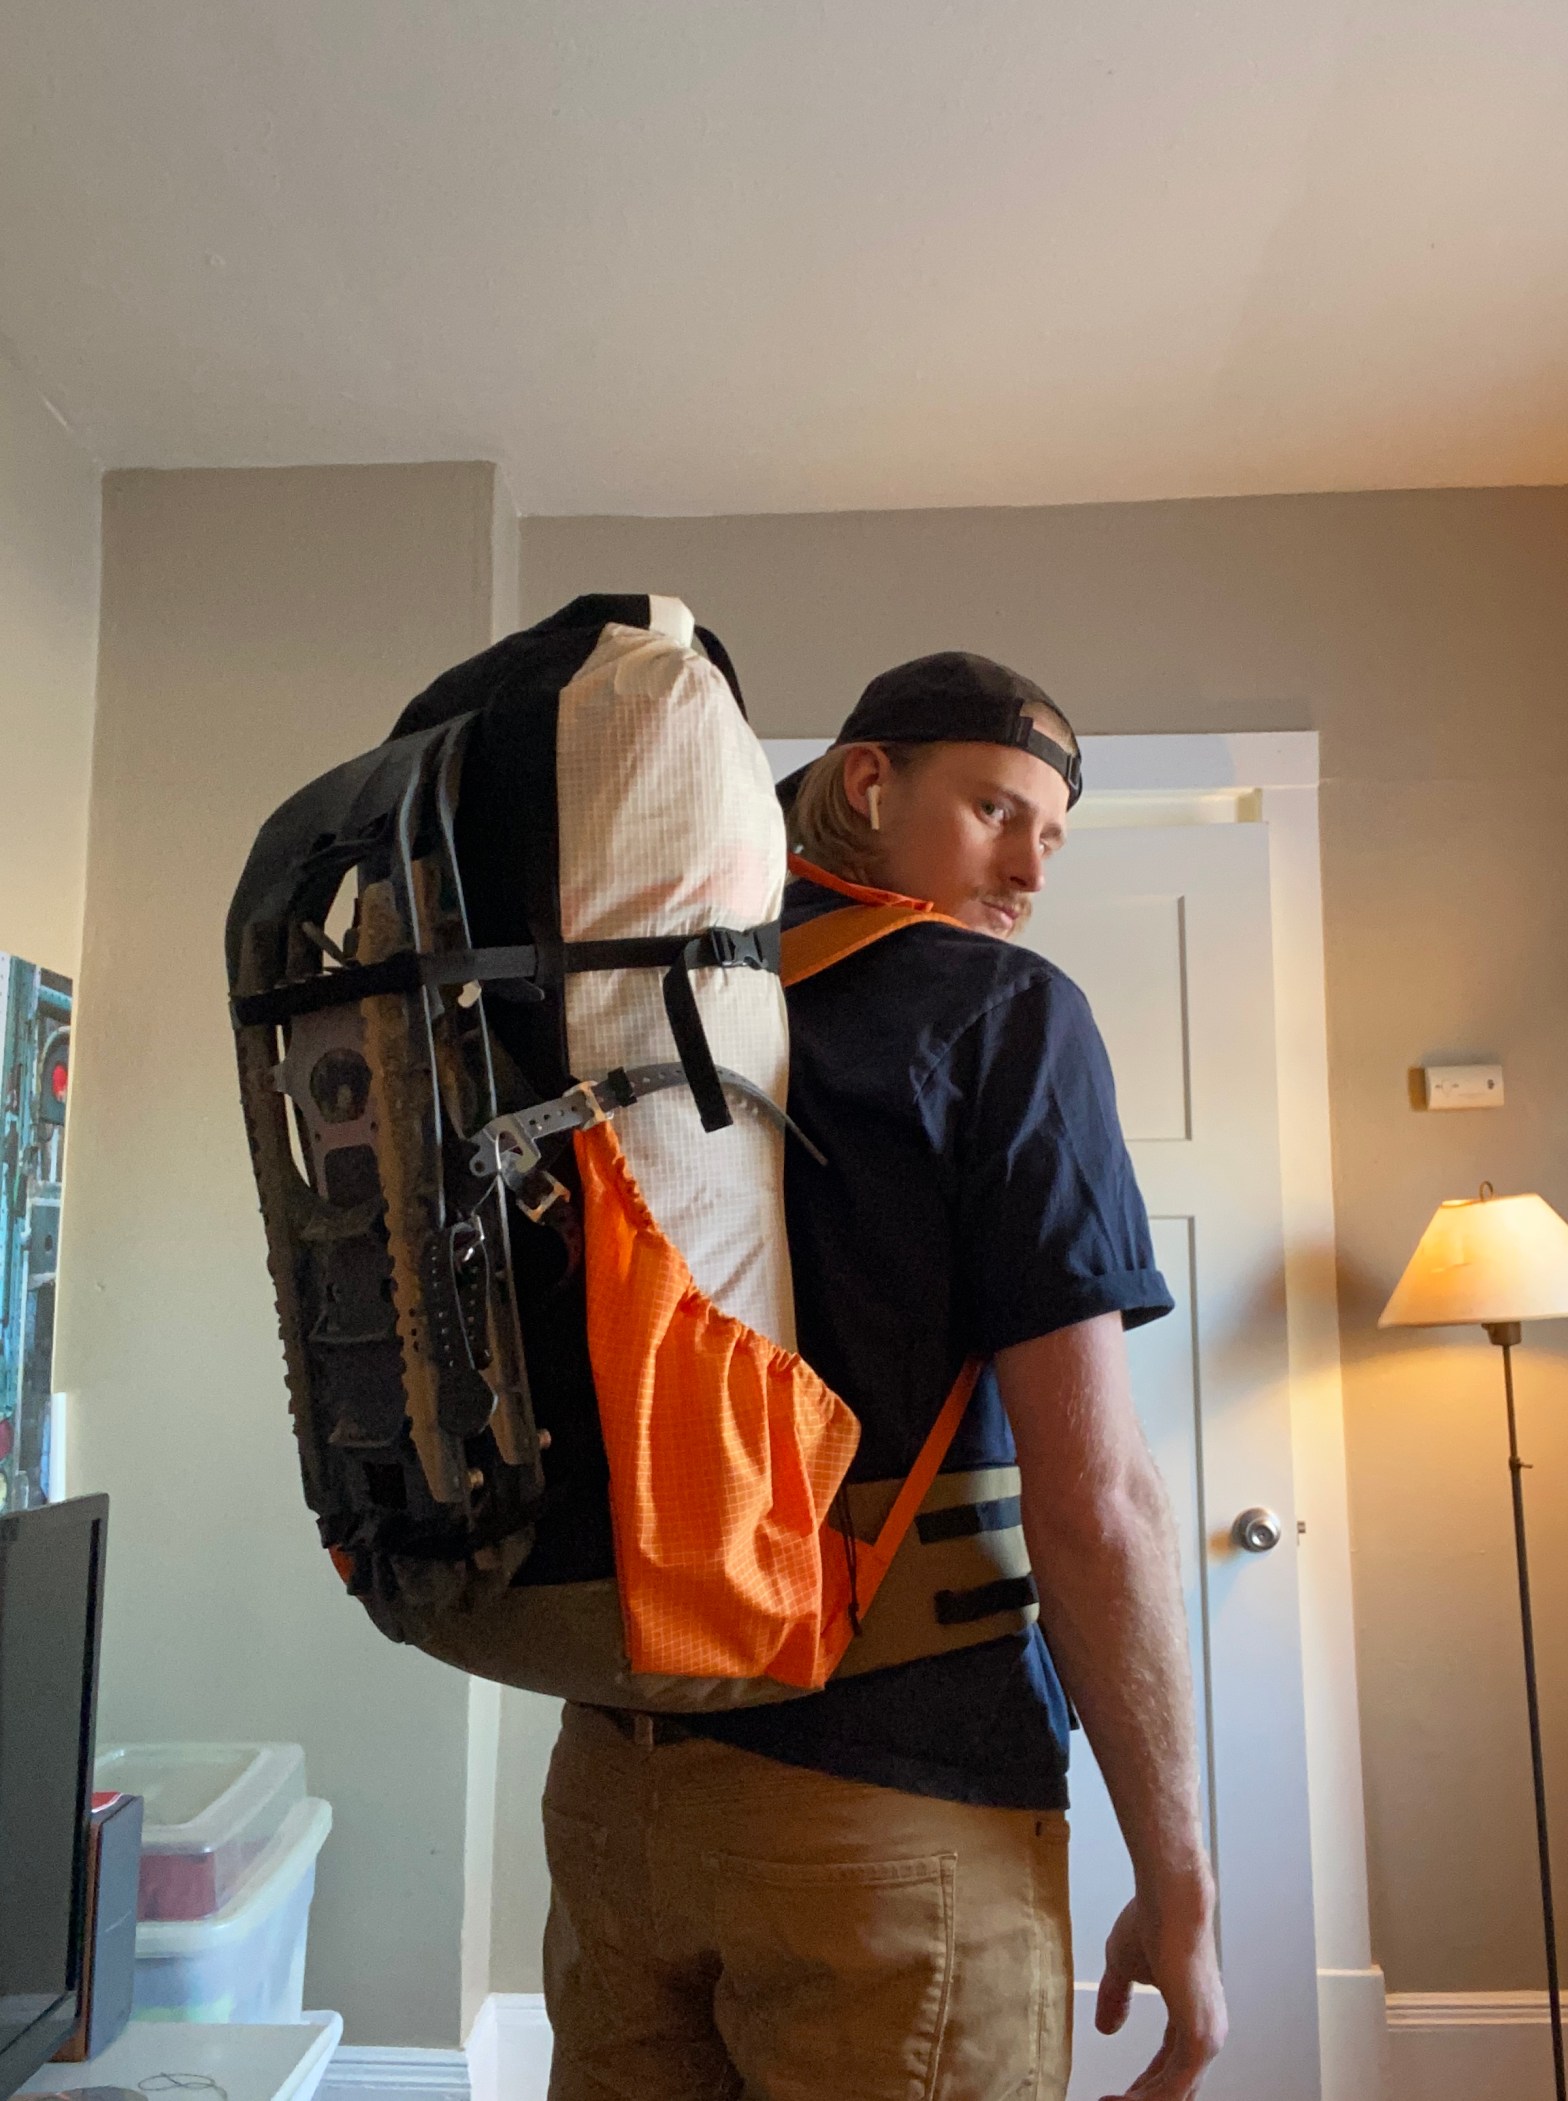
The pack is designed to be my ultimate Bob Open/lightweight backpacking adventure pack. It should hold a sleep system, shelter, and a few days of food along with just enough clothing and weather protection to keep me comfortable enough for up to a week on the trail. It is a pack designed for moving fast in challenging terrain.
The details

I typically prototype my packs with brown kraft paper. It is not a fast process or necessarily a foolproof one, but it gives a good idea of general fit and whether or not certain panels will play nicely with each other. It works surprisingly well for curved panels and shapes. The first image above is of 2 different pocket patterns I was experimenting with. I ended up opting for the left one. I also found paper to work very well for perfecting the angle of the shoulder straps. With the paper, it was very easy to see which side of the strap needed to be trimmed further for optimal positioning when in use.
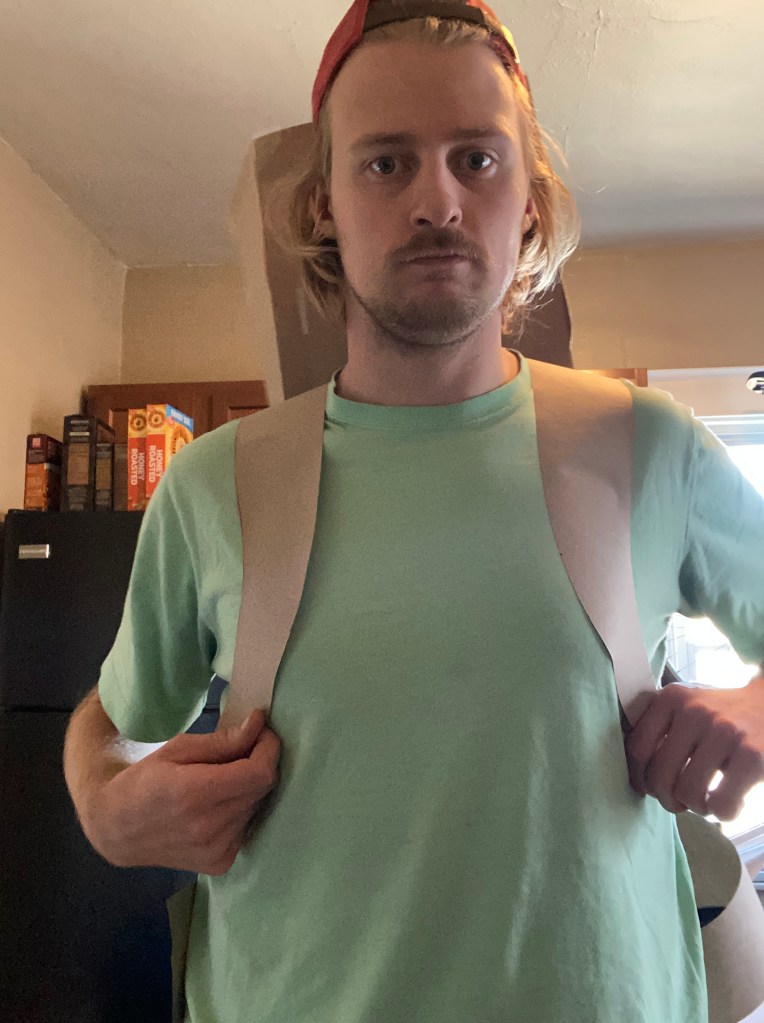
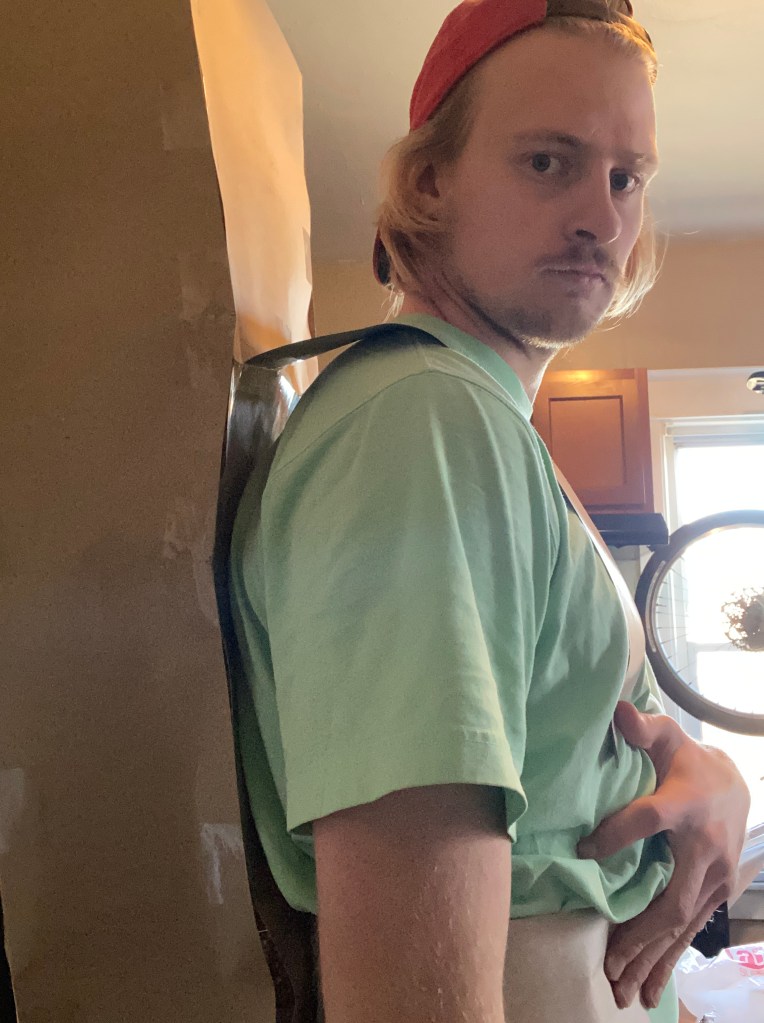
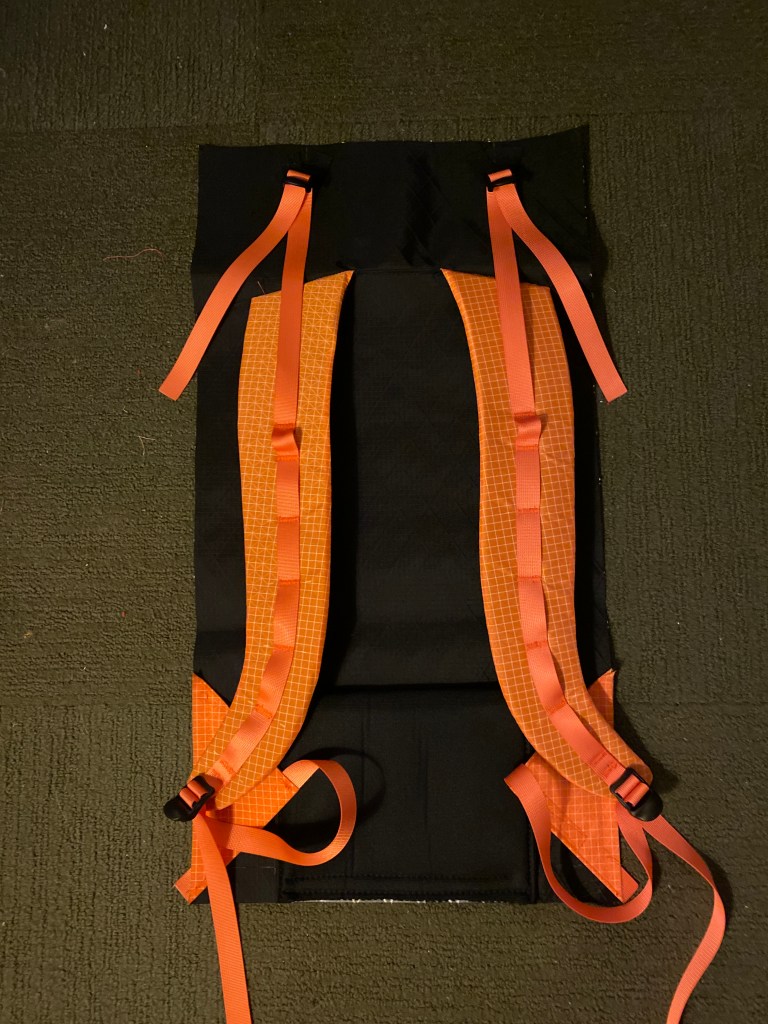
Straps: the straps are a custom design, loosely based on the straps from my Granite Gear Crown 60, but they are wider to alleviate pressure on the shoulders. They have polyester webbing daisy chains running down them vertically for use in attaching a sternum strap or hanging a water bottle/snack pouch or my garmin inreach. The webbing turns into the load lifter strap at the top to keep the design clean and simple.

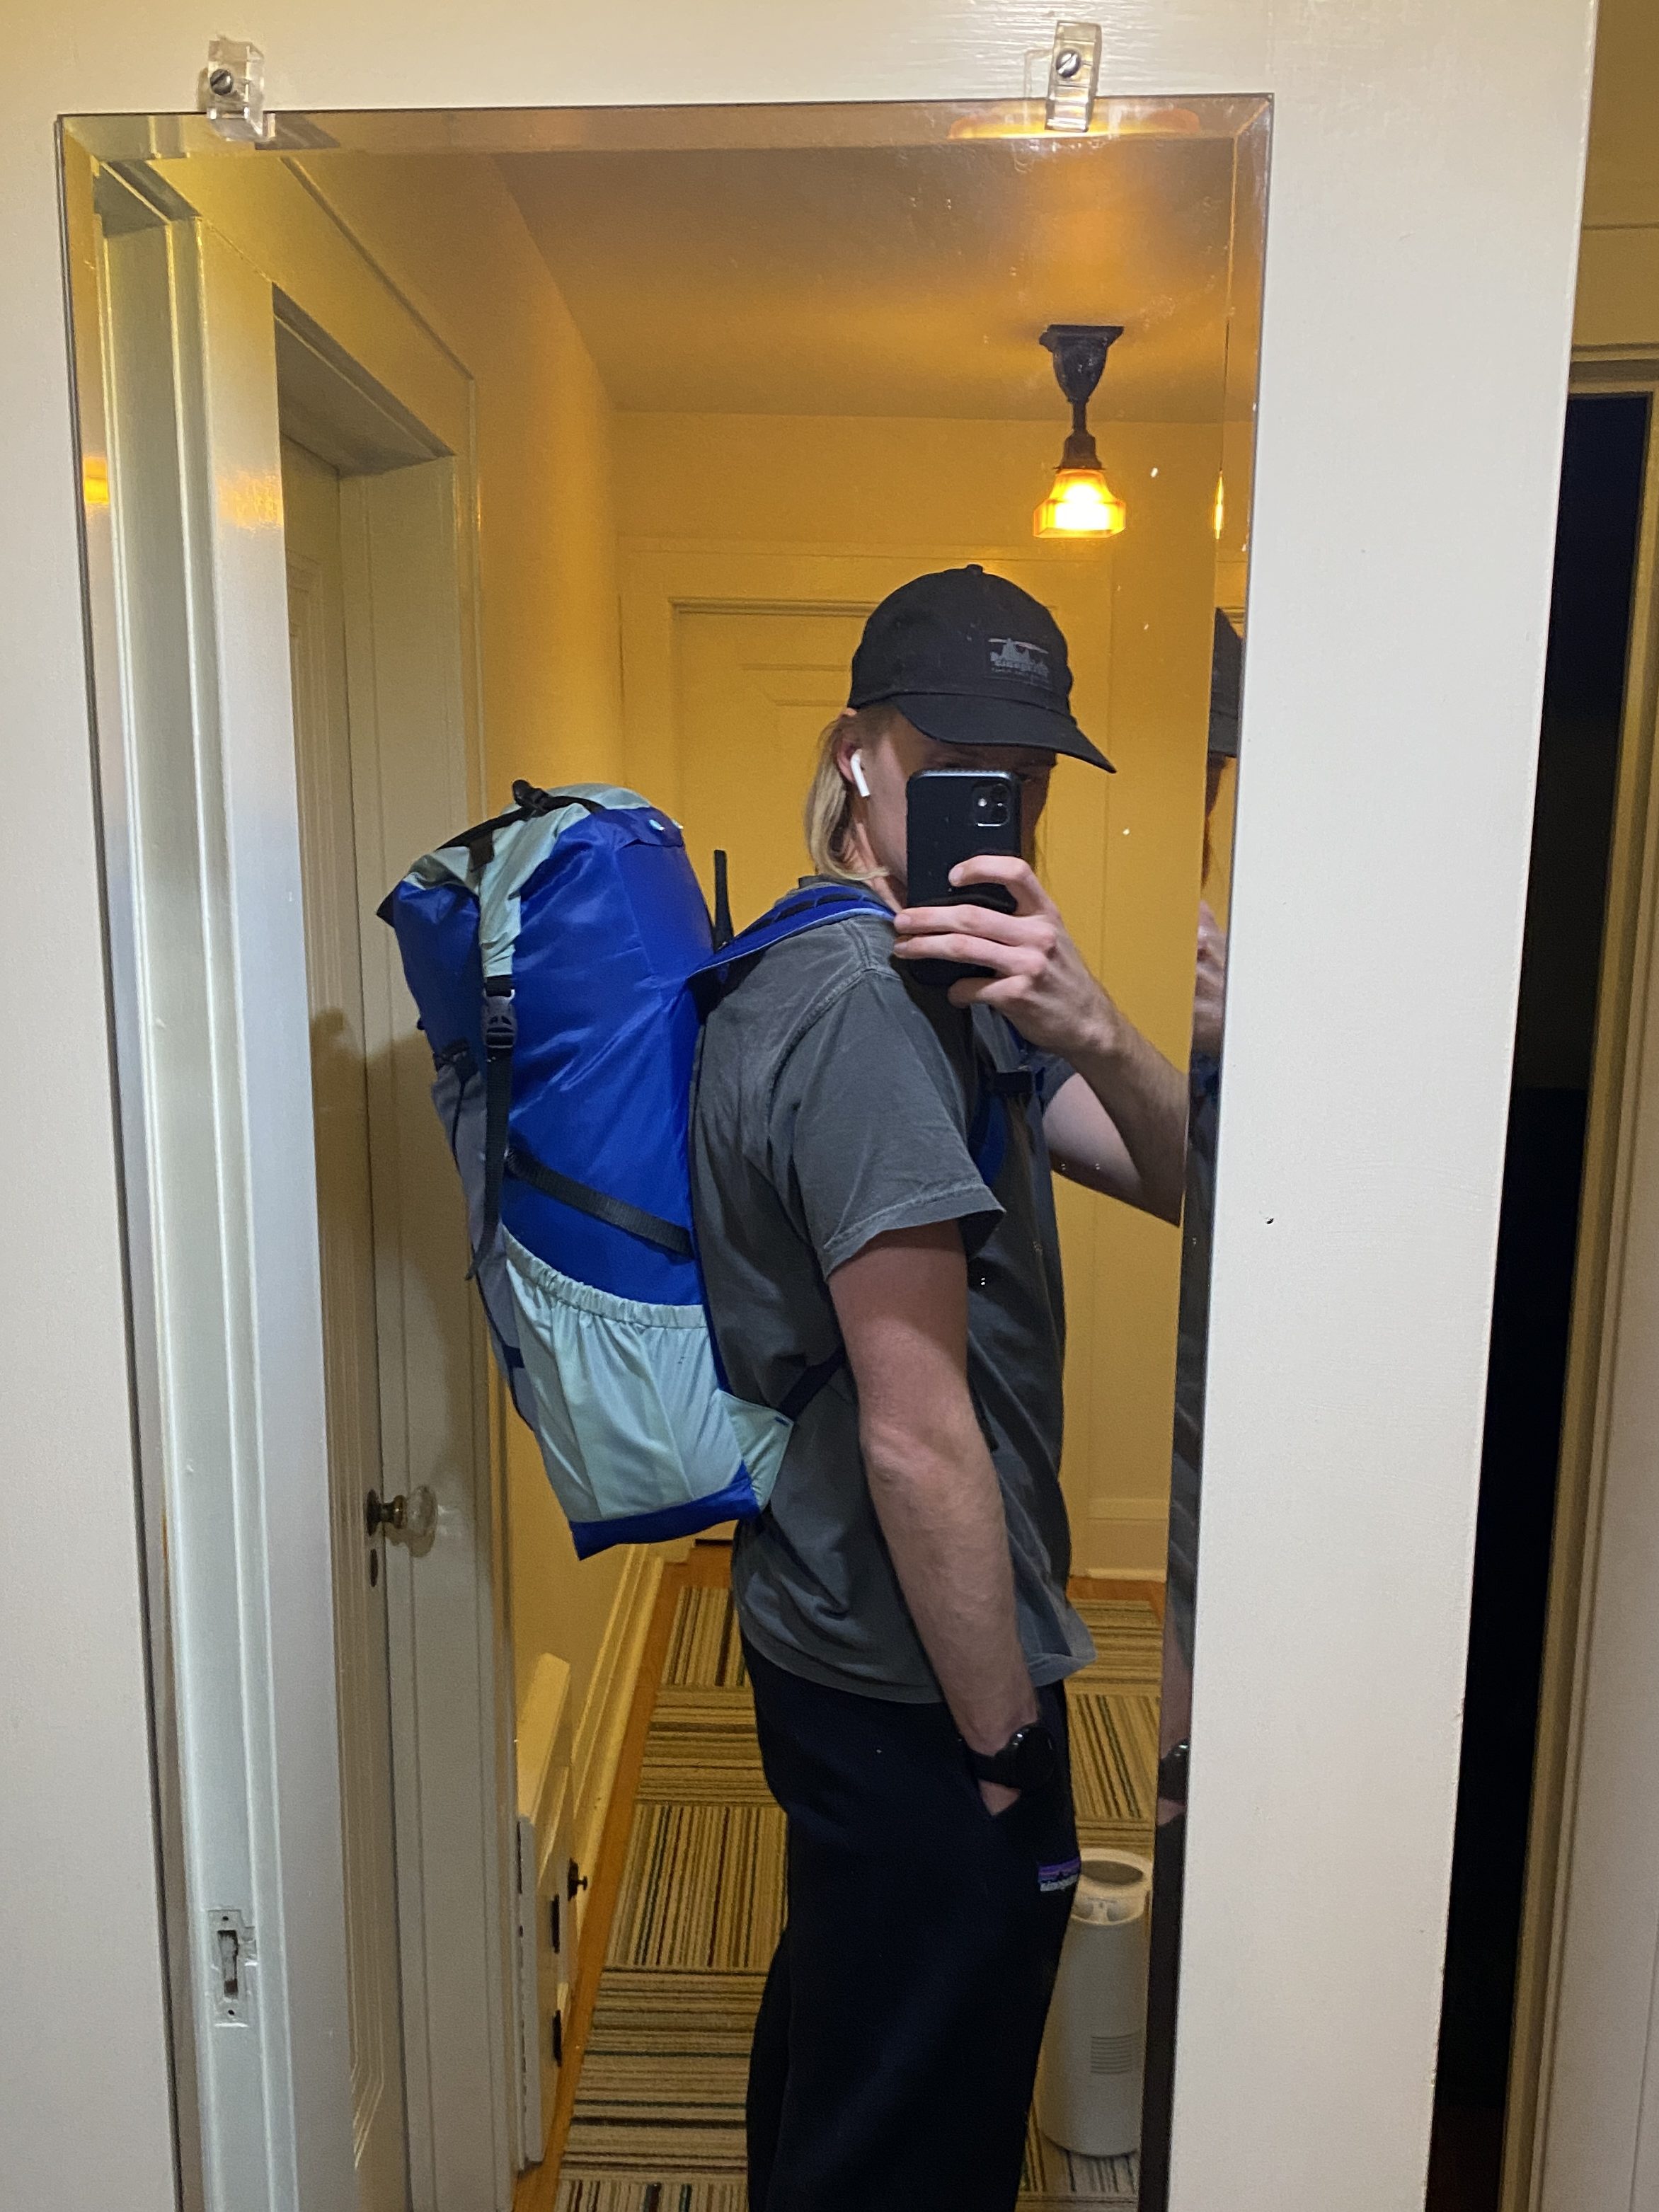
Front Panel: tapers from 9 inches at the bottom to 10 inches at the top, slightly widening to allow for ease of packing and for making sure that the bulk of the load sits higher between my shoulder blades. The front panel also wraps around the bottom of the pack to reduce seams and water ingress while increasing durability and reducing weight.


Side panels: 6 inches deep at the bottom, 7.5 inches above the shoulders. This has the same volume-increasing effect as the front panel taper but also holds the pack body closer to my body above the shoulders. Haven’t used this design before and am curious to see how it works.

Back Panel: 3-piece construction. Main lower panel that straps are sewn into, middle panel that straddles shoulder strap–load lifter connection points. This plus the lower panel equals the height of the “frame sheet”. Top panel extends to the top of the pack. Also houses the velcro used to attach the hipbelt, hidden by a lumbar “pad” made of the same material as the back pad and some 1/8″ spacer mesh for comfort.
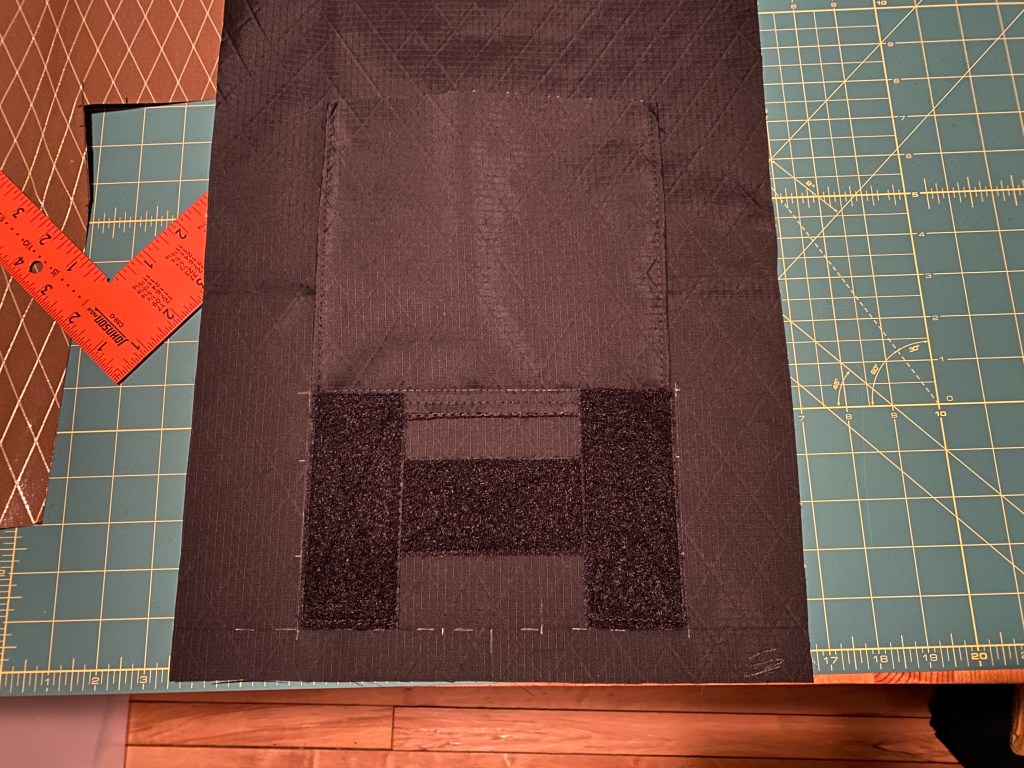

Pad sleeve: made of the same material as side panels to reduce weight and keep pack interior light. 2″ wide velcro closure at top to ensure that there’s no funny business when things are jostling around.
Frame sheet: 1/2″ closed cell foam from an old sleeping mat to provide some rigidity and padding. Corrugated plastic HDPE yard sign with channels running horizontally to prevent barreling. Don’t know if this works yet, but I’m hopeful. Haven’t seen it done before, so I will definitely report back.
Side pockets: 15 inches across, 2 pleats at the bottom, replaceable shock cord closure with a cord lock at the bottom end that’s sewn into the seam for easy 1-handed operation while moving. 7″ tall against the user and 14″ tall along the front panel. I may alter these dimensions in a future pack. 7″ is accessible, but does require some shoulder mobility.
Hip belt: traced loosely from the hip belt on my crown 60. I have very high hips and tend to wear my hip belt higher than most. I had hoped to use the stiffer, 1/2″ foam that I used in the back pad, but my machine wasn’t able to handle it, so I went with the same 1/4″ foam used in the shoulder straps. Hopefully it is stiff enough. I’m cautiously optimistic that the loads I carry in this pack will not be heavy enough to really make it sag, but just in case, I opted for a thicker/stiffer fabric on it to try to help provide structure. Slides under the lumbar pad to velcro onto the back panel. Feels very comfortable. I considered adding cinch straps to the outside of the back panel to be able to cinch the load closer to the hips and prevent sway. Since the belt attachment is only 3″ narrower than the back panel, and most of the weight will be sitting up high, I opted not to. This saves some weight and cleans up the external looks of the pack.


Compression: There are buckles at 2 heights on either side of the pack. If compression is all that is desired, plain webbing can be buckled in to provide it. If snowshoe carry is desired, webbing with snowshoe lashing points can be attached. If a modular front pocket/pack is desired, it can also be attached using this webbing AND used to provide compression. I’m really pleased with how this system has turned out. I’m excited to come up with more ideas for attachments/pockets. An early idea is a sleeve for my sven saw for winter trips in the boundary waters where evening fires are mandatory.

Bottom panel: Is sort of just part of the front panel, but has been reinforced with an extra layer of fabric as well. Will punch a grommet into it to allow drainage.
Materials:
- Straps: 210D HDPE gridstop from RBTR, 3/4″ polyester mil-spec replica webbing from RBTR to prevent stretching when wet, dragon ladder locks, 1/4″ EVA closed cell foam, 1/8″ spacer mesh from RBTR.
- Front panel: “VX21+ w/ UPE x-ply” with a recycled face fabric. All the Dimension Polyant fabrics used in this pack were experimental prototype runs sent to me by Taylor North. I am grateful for this and am sorry that I wasn’t able to make the most of them and/or test them earlier. 3/4″ Cordura nylon webbing for the daisy chains (to save cost compared to polyester webbing).
- Side panels: V07 w/spectra grid reinforcement. Chosen because sides are not typically high-wear areas and translucent fabric will allow easier viewing in the pack. This may not hold up well to use due to 70D face fabric. Time will tell
- Back panel: same VX21 as front panel, Cordura nylon webbing and dragon ladder locks for load lifting. 1/8″ spacer mesh for lumbar. 2″ velcro loop for hip belt attachment.
- Pad sleeve: same V07 as the side panels. 2″ velcro closure at top.
- Frame sheet: 1/2″ closed cell foam from old sleeping pad and corrugated yard sign. If you are hosting an open house, let me know and I can part with my frame sheet for a few days.
- Side pockets: 210D HDPE Gridstop from RBTR. Shock cord (had to use narrower stuff than what I ordered. 1/8″ shock cord from RBTR did not fit through the “two-hole anchorable cord lock” they sell. Slight bummer that the site didn’t mention that, but oh well. Live and learn.
- Hip belt: X50 tactical w/ spectra x-ply. The face fabric on this is 500D Cordura, I believe, so it’s definitely overkill for a hip belt, but I liked the color and wanted to try to add some stiffness to the 1/4″ closed cell foam. 1/8″ spacer mesh. Dragon locks. 3/4″ Cordura nylon webbing and 1 buckle.
- Compression: 3/4″ Cordura nylon webbing. Potential for added materials depending on what attachment is chosen.
- Bottom Panel: same X50 tactical as the hip belt for abrasion resistance on the bottom of the pack.
- Roll top: 1/32″ HDPE sheet cut to 3/4″ inches wide, Cordura nylon webbing, adjustable buckle.
For those interested, below is my entire list of design considerations and the ideas I’ve come up with or stolen to solve for them. If you’re uninterested, the internet is vast and I’m sure there’s something for you out there.
WHAT DOES IT NEED TO DO?
- Hold up to use. Used mostly in the Bob Marshall and northern Minnesota, with frequent rain and inclement weather, lots of sharp wood and thick brush all around. Trails not maintained very well/often so plenty of log jams and deadfall to contend with. Very little rock to contend with, however.
- Waterproof and abrasion-resistant fabrics on all pack panels. Most important on back and bottom. Pack should taper both up from the bottom and from the back panel to the front to make it “slippery” in tight spaces. Pack should also not stick out much beyond my body. Anything 12” or narrower at the back panel will be narrow enough that it doesn’t get in the way. Sticking to 6” or 7” depth would be ideal to keep pack slim and make log jamming easier, especially with snowshoes attached.
- Be lighter than my current pack
- My current Granite Gear crown 60 has a claimed weight of 34 oz. It also has hip belt pockets that I never use, but is probably right around there. Would love a pack under 24 oz but can deal with under 2 lbs). Main push is for increased functionality. Decreased weight is a bonus.
- This pack will be for pushing short, multi-day missions with a vast majority of time spent on feet and moving, and a relatively short time (think from 4-8 hours per day) in camp/sleeping.
- Not a lot of room needed for extraneous items like camp chairs or full cooksets
- Hold ultralight 3-season setup and up to 5 hard days of food
- As food is eaten, volume needs decrease, and the pack should be able to shrink effectively with smaller loads. Must have compression from the top and use dual compression straps around the entirety of the side and back panels to keep loads close to the body.
- Sit tightly and comfortably against my back.
- Good straps (with load lifters?) and a hip belt that helps to cinch down and stabilize the pack from rolling side to side. Use side panels which follow the contours of my back. 1.5-2 inches of side panel gain in the 4-6 inches leading up to the shoulder strap mounting point in the style of Dave Chenault’s 610 packs. This also facilitates easier packing, as top has greater circumference than bottom.
- Transfer some load from shoulders to hips, in cases where I’m carrying large amounts of food or snowshoes are on the pack, adding weight.
- Have a pad sleeve that facilitates removal of the back pad or changing pads from a foam pad to a slightly stiffer foam/HDPE framesheet laminate. Dave Chenault mentioned taping some 1×1/8 aluminum bar stock to his back panel foam pad to avoid barreling, which may be worth looking into. Planning to try making a framesheet that is a 1/2” foam/corrugated plastic yard sign laminate with the yard sign channels running horizontally to prevent barreling. Hip belt should be removable and attach to the pack using velcro that runs under a lumbar “pad” made of 3D mesh for comfort and ventilation. Would prefer framesheet to be externally removable, but the system I implemented on my last pack was not exactly what I wanted. Likely, it’s better to have the outer panel be continuous and have sleeve closure on the inside of the pack.
- Keep main pack bag accessible while snowshoes, etc. are strapped to the outside.
- Hope to achieve this with a sturdy roll top with adjustable buckle to provide compression from the top. A top compression strap would be necessarily covered by shoes strapped to the front of the pack, and compression straps from the side of the roll top add weight and uncertainty, as the compression angle differs when the pack is full vs empty.
- Keep gear mostly dry in wet conditions/not get too heavy in rain/accumulated snow
- Waterproof fabrics. Will likely not seal seams, but will drain well. Depending on weight, may seal a few key seams.
- Drain well. Main cylinder and side pockets should be able to dump water easily.
- Grommet through the bottom of the main bag toward the back panel and grommets in the bottoms of side pockets
- Hold snowshoes externally in a secure way that is quick in transition and doesn’t impact other functions of the pack
- Snowshoe attachment system using buckles with webbing that double as the pack’s compression system. Webbing to be protected from abrasion by pack fabric sleeves that ride against the snowshoes’ crampons and preserve life length. “Doesn’t impact other functions of the pack” have snowshoe webbing and compression system be removable so that it can be either just compression straps or mount a talon-type pocket on the outside as well. Lower compression webbing should pass through the side pocket through a small window so that it doesn’t compress the side pocket and impair use.
- Have gear accessible in the form of reachable side pockets and shoulder strap pockets.
- Reachable side pockets will be large and secured with shock cord in a manner that permits one-handed access. Shoulder strap pockets may complicate strap construction too much? Maybe better to just have daisy chains run from load lifters down to ladder lock at the bottom of strap to provide attachment points. Still need to pattern to figure out the best way to maximize volume in the side pockets. Would love to avoid pleating if possible. Perhaps gussetted? Could increase volume while decreasing the amount of fabric in the pocket as well as decreasing the amount of pleat in seams, which frees up more space. Will look into it.
- After writing this initial plan, I stumbled across Dave C’s posts on the tamarisk and specifically the one on its side pockets, where he has done something similar. This makes me feel good, because he is somebody who has built a lot of packs and generally knows a lot about what works and what doesn’t. But it also makes me feel like this, my first serious foray into pack building, is going to come across as one big Dave C rip off. Apologies, Dave. You have good ideas and apparently I want to steal them all.
- Reachable side pockets will be large and secured with shock cord in a manner that permits one-handed access. Shoulder strap pockets may complicate strap construction too much? Maybe better to just have daisy chains run from load lifters down to ladder lock at the bottom of strap to provide attachment points. Still need to pattern to figure out the best way to maximize volume in the side pockets. Would love to avoid pleating if possible. Perhaps gussetted? Could increase volume while decreasing the amount of fabric in the pocket as well as decreasing the amount of pleat in seams, which frees up more space. Will look into it.
- Leave room for cross-body or between-strap storage
- Straps should not curve too far in across the chest or be too wide. Somewhat narrow straps with a gentle s curve.
- Stash gear (jacket, wet shelter, etc) in/on outside when in between uses or too wet to be inside.
- Side pockets will be large enough to swallow small items, and compression straps on the outside will provide storage for larger items. Can carry gear ties or voile straps to lash items to daisy chains if necessary.
