In preparation for my attempt at completing the Bob Marshall Wilderness Open this May, I am working on getting my gear list dialed in. I am aiming to put in big-mile days on my way to the finish point, (read: 30-40 miles, depending on conditions) and that means keeping my feet moving and limiting stops to take my pack off for breaks and cargo retrieval. My Granite Gear Crown 60 has some custom Zimmerbuilt hip pockets that the previous owner added to the hip belt, but I needed more storage for quick access to my phone, snacks, maps, etc. I liked the idea of a cross-body bag and had some spare materials lying around, so I decided to take a crack at designing one to fit my needs.
Design Needs
The cross-body bag needed to be able to do the following:
- Hold my phone/cards & cash – I use my phone to take pictures/video of the scenery and use it for GPS mapping
- Hold food for 4+ hours of hiking – limit stops to remove my backpack for food
- Hold maps & compass – these are my primary means of navigation and I always have them on me.
- Not affect the fit of my backpack – includes a low-profile strap around my back and fitting between the shoulder straps in front (i.e. no pressure points)
- Look good – look good, [hike] good
- Be easily accessed while hiking – this is the whole point
The ideal bag would also be lightweight, as every ounce matters when you’re logging 30-mile days with 6,000+ feet of elevation.
Addressing Needs
| Hold phone | I measured my phone and found that it was just under 3.5″x6.5″. I sized the front pocket to measure 4″ by the full length of the bag – 8″. I wanted my phone to have its own, easy-access pocket |
| Hold snacks | I eat mostly bars and food in sandwich-size ziploc bags, so those would fit in a 5″x8″x2″ body. |
| Hold maps | The Cairn Cartographic Maps I’ll be using for the Bob are a tad longer than 8″ but fit well in my paper mock-up bag, so I stuck with that width. |
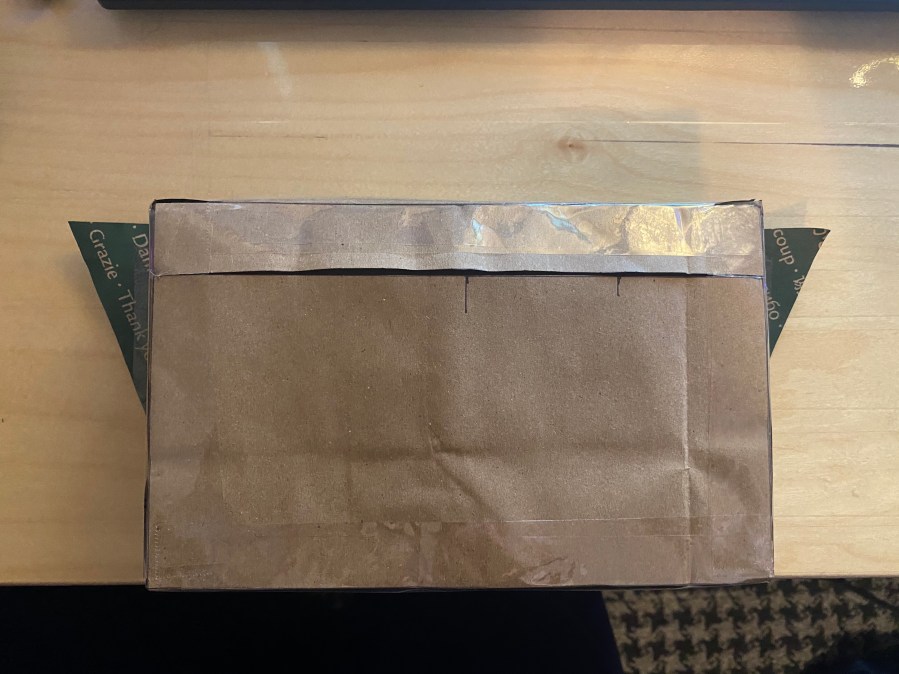
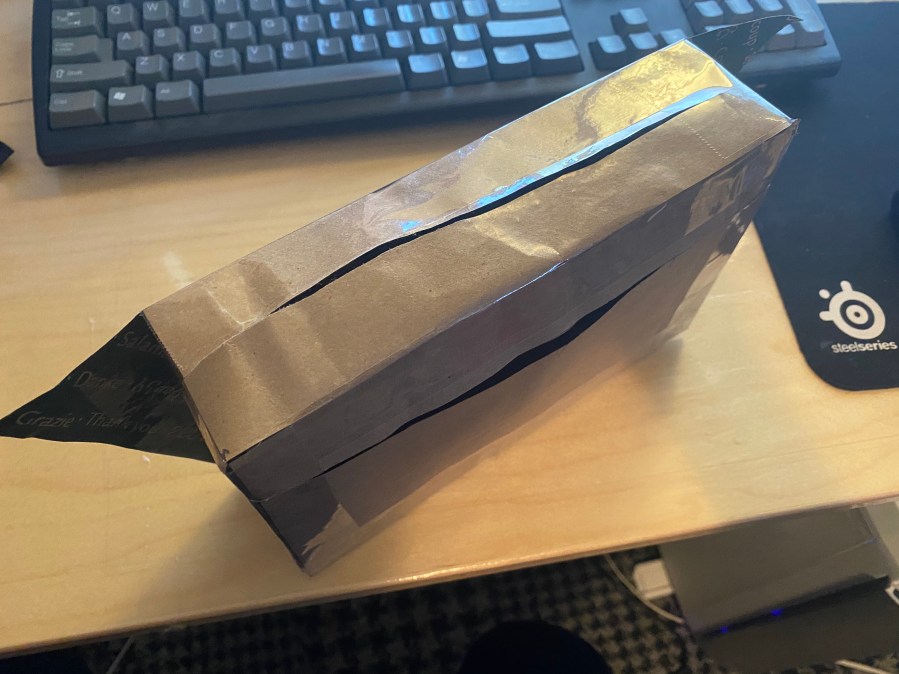
| Not affect fit | This was crucial. A bag that was uncomfortable to wear would be ineffective as a tool. I estimated a size of 5″ tall by 8″ wide by 2″ deep and made a mock-up out of the shape out of paper grocery bags to test out with my backpack on. I decided to use a standard piece of webbing to secure it around my back. It’s thin enough to not cause hot spots. The 5″x8″x2″ ended up being a perfect size. Any taller or wider would have been too big. Any deeper would have made the bag unwieldy when full. |
| Look good | I wanted the bag to be symmetrical and sleek and to hug my torso when properly adjusted. The cross-body nature necessitated the straps leaving either side at different angles, but with slanted wings (see photo) both straps could follow the organic lines of the bag, rather than jutting out at weird angles. |
| Easy access | One zipper on the top side to access the contents of the main body, and one zipper on the front to access the phone pocket. The top zipper would have grosgrain pull tabs at either end to assist in working the zipper. |
Mock-up/Prototype
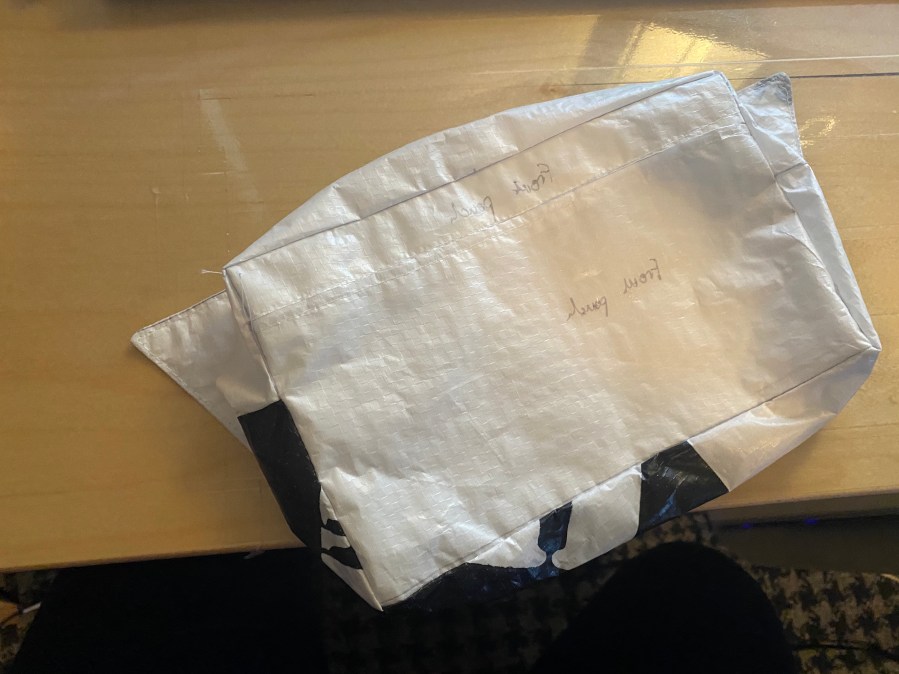
I made 2 mock-ups of this bag. The first out of a paper grocery bag to see if the dimensions and zipper locations would work. The second out of Tyvek-esque house wrap (cheap) to see what the best seam ordering would be. I got lucky this time and was successful on the first attempt with both. There is probably an easier order of construction, but the way I ended up doing it made the most sense in my head.
Construction
This bag was more complex than the simple stuff sacks and hastily-prepared handlebar bag I’d made before. I had also made a simple 1p tent, which was more difficult to design but fairly straightforward to assemble. I had seen bags with the zipper on top be constructed by making basically a large envelope and then sewing off the ends into a rectangular shape, a la the RBTR ZPP Kits. But because I was mounting wings and a front slim pocket to keep my phone separate from the rest of the things I would be carrying, I couldn’t visualize a way to make that construction method work for me. Thus, I was stuck with a method that would require me to sew the zipper into the outer front panel, sew that whole panel to the inner front panel, sew the zipper into the top panel, and then sew the top and bottom panels to the front and back panels, making sure to insert and sew in the wings between the top/bottom panels and the back panel. It’s hard for me to verbalize this process.
Material: For a bag like this, I would use a lightweight pack fabric: X-Pac, DCF, NorthPak, or whatever you want to use. It doesn’t need to be super durable, since your chest area likely won’t be seeing a lot of abuse, but if you like waterproof bags, constructing it out of DCF and bonding the seams might be a good way to go. I ended up using a prototype fabric from Dimension Polyant sent to me after a post I made about another pack fabric on Backpacking Light. The specifics can be seen below, and the fabric has held up wonderfully so far. I’ve been snowed on and have left it out overnight in sub-freezing temps, and it’s still in great shape.

Step 1: Construct the wings, which are just a right triangle with a 2″ leg and a 5″ leg, by assembling them inside out with a straight stitch around the perimeter before flipping them right side out and top stitching them to create a bit of structure in the panel and reinforce the webbing sewn into them. I added an extra line of stitching through the webbing to support the forces on the top stitched seam.
Step 2: Cut 2 front panels and designated one as the outer front panel. Cut this into 2 pieces, one 1″ tall (upper) and one 4″ tall (lower). Sew the zipper onto both of these and then zip them together to create the outer front panel, which would be sewed to the inner front panel to create the “front panel”. Note: I didn’t use waterproof zippers because I didn’t have any on hand and was leaving for a trip in 2 days. With more time, I would have ordered and used waterproof zippers.
Step 3: Cut the top panel in half and sew the zipper to either side. Put one slider on either end and meet them in the middle to have 2 sliders, opening either up or down.
Step 4: Sew the top and bottom panels to the front panel, starting in the middle of both.
Step 5: Sew the top and bottom panels to the back panel, making sure to sandwich the wings in the side seams.
Step 6: Sew the ends of the top and bottom panels together, sandwiching in a small grosgrain loop to act as a pull tab on either side of the top zipper.
Step 7: (optional) use thinned silicone to waterproof your seams if you want the bag to be waterproof, or bind the seams with grosgrain if you want a cleaner internal appearance. Note: Since my bag didn’t have waterproof zippers, I decided not to waterproof the seams because I didn’t want to walk around with a bag full of water strapped to my chest if I got caught in a downpour. My maps are waterproof and I would probably keep my phone in a ziploc even in a “waterproof” bag.
Step 8: (optional) use a pliers to snap off the metal zipper pulls and install some of your own. You can buy zipper pulls or just use some thin cordage you have lying around. This will help keep the noise down and make the zippers easier to find with cold/gloved fingers.
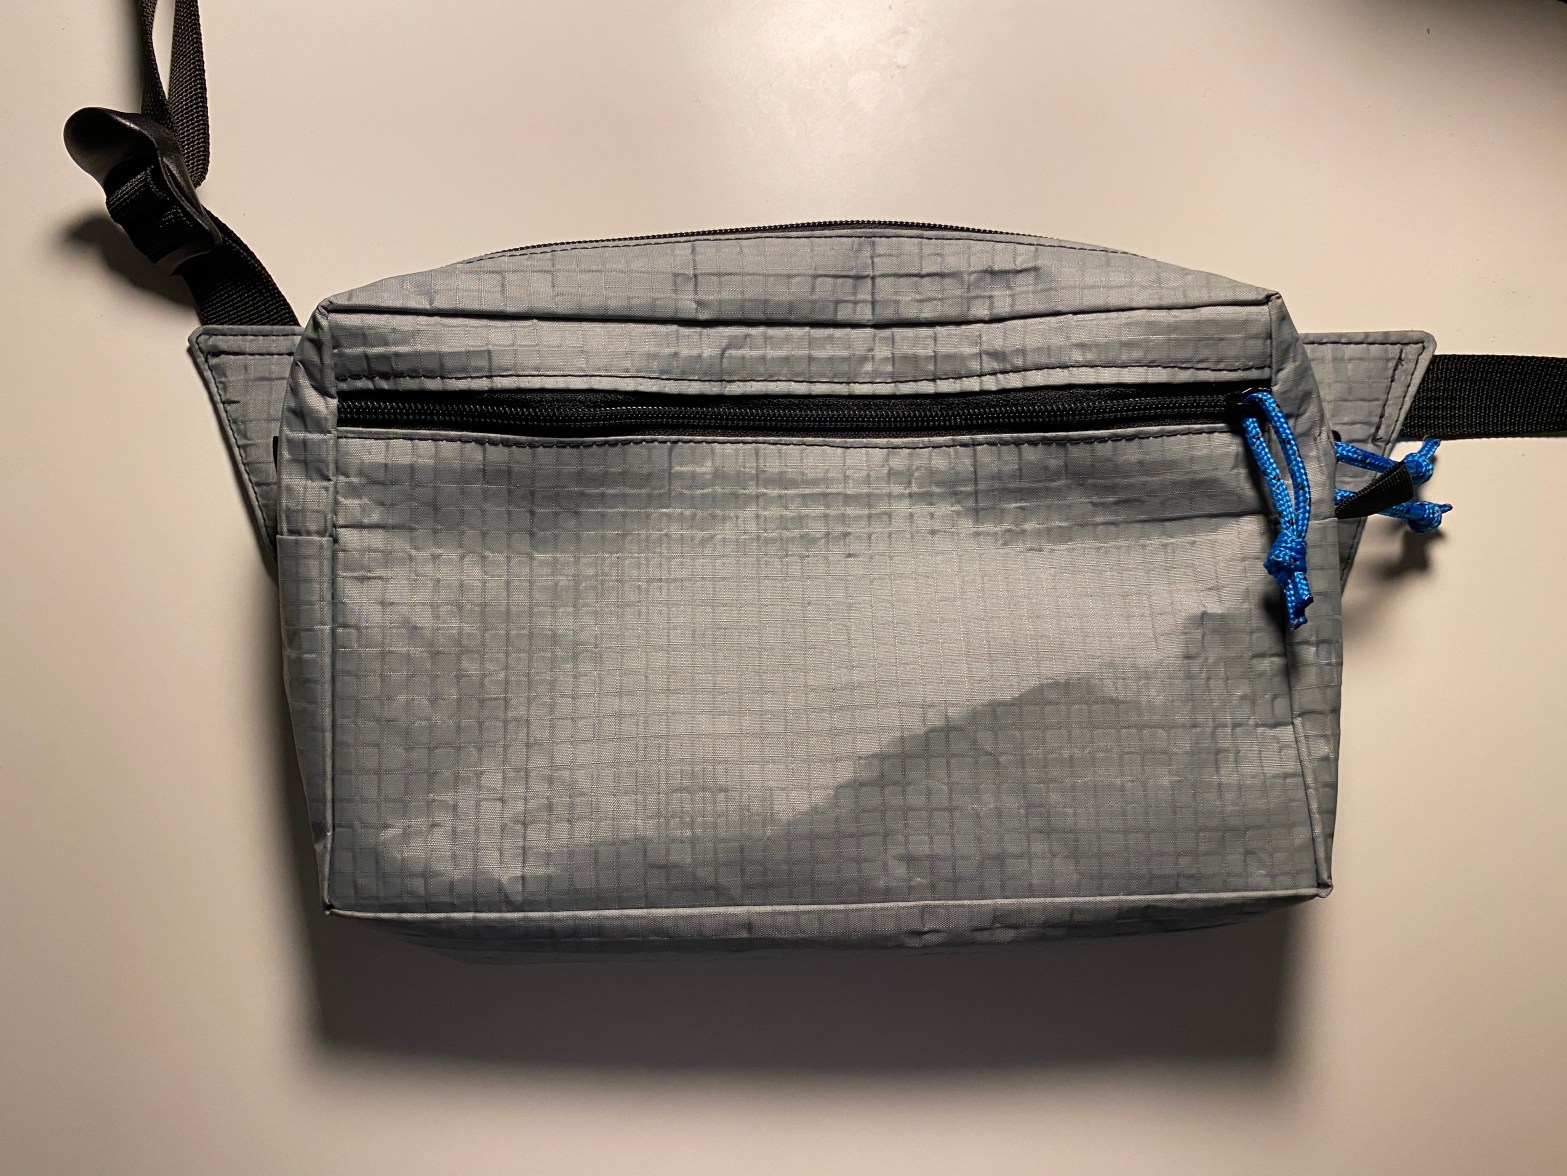
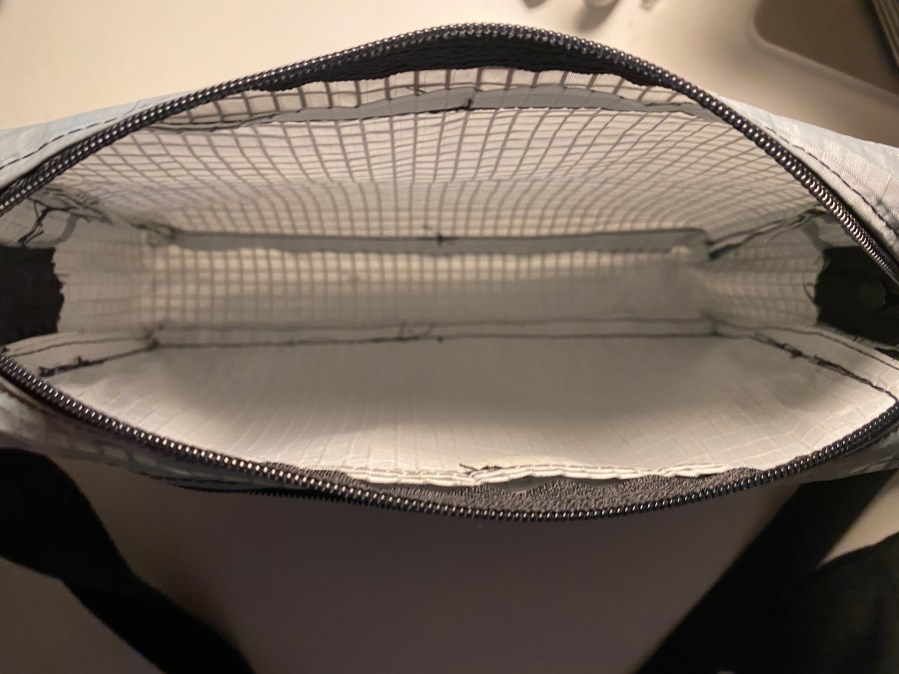
Finished Product
Below are some photos of the completed bag. I’ve used this bag on 2 overnight backpacking trips now and it performs very well. The best thing you can say about a bag like this is that you never notice it, and this bag is entirely unimposing. It carries everything I want it to and never gets in the way. When I need my phone or a snack, I can access them quickly, but I never have to think about the bag. I have also been bringing this bag out to shops and on errand runs with me. It holds my phone, wallet, keys, and hand sanitizer (very key in the COVID era) and keeps them all handy. It doesn’t flop around if I’m riding my bike to the store either, which is nice. Final weight: 2.38 oz.


What I Would Change
I’m pleased with how the bag turned out. It does everything I ask it to and never gets in the way. But because it was a last-minute project (as so many of my projects are), there were unavoidable compromises that I would approach differently in the next iteration.
- Buckle – As you can see in the pictures, the webbing attachment at the looker’s left (bottom) of the bag is just a dragon adjustable buckle. I didn’t have any buckles at the time of construction. I typically just tighten it down and loop the loose end around to keep it out of the way. Next time, I would get a 3/4″ buckle with a fixed female end and an adjustable male end. The buckle would make putting on and removing the bag possible while wearing a backpack.
- Zippers – I would use waterproof zippers and use thinned silicone to seal the seams as well as possible.
- Color – I would use a grey thread to match the fabric. I only had black and white at the time of construction. I might also use two or three different colors of material to play around with the aesthetics.
- Construction – Next time I make one of these, I will spend a little more time trying to figure out a more convenient method of construction. The current method requires a lot of stopping and repinning/reclipping. Lowering the number of steps would be nice and would save time.
Thank you for reading this gear design report. I don’t have any pictures of the bag in action, but will be sure to post some photos on my instagram (@quitean0ther) next time I get to use it in the field. Feel free to hit the “Contact Me” button or leave a comment below if you have any questions about this design or if you have any suggestions for me to try next time.
